Recently in Rudder Category

Dimpling rudder skin

I dimpled the holes in the rudder skin that connect to the spar and the top and bottom ribs. Now the skin is ready for priming that edge. I didn't prime this region before, because those rivet holes needed to be match drilled after riveting the stiffeners and bending the trailing edge.

Did I ever mention that the DRDT-2 is a great tool? A heavy sucker, but wonderful to work with.

2012-12-19_09.jpg

Rudder horn riveting

In my last post about the rudder horn you might have noticed that I riveted the R-710 rudder horn brace first, and then the rivets that connect the rudder horn and the rear spar. Van's calls out for a different order, but I have no idea how to add the brace without serious bending once the rudder horn, bottom rib and rear spar are connected. That's why I did it this way.

I had to make an L-shaped custom bucking bar to reach all those rivets through the small hole in the rudder horn brace, but in the end it all worked. Look ma, all solid rivets:

2012-12-18_10.jpg

2012-12-18_11.jpg

2012-12-18_12.jpg

Deburring rudder skin

I deburred the holes from the rudder skin to the spar, and edge-finished the skin.

Rudder skeleton

Today I came back from work rather late, after a frustrating day of merging two software projects, so I really wanted to do something fun and set some rivets. The first victims of my enthusiasm were the R-703 tip rib and the R-713 counterbalance skin:

2011-03-02_01.jpg

Then I continued with the upper two spar reinforcement plates and finally squeezed the first seven rivets of the R-710 rudder horn brace and the R-405 rudder horn. The hand squeezer with the longeron yoke comes handy here, but I guess I will have to use the gun for the rivets holding the rudder horn to the spar.

2011-03-02_02.jpg

Yes, I primed the rudder horn too wet. Still learning ...

Priming -- at last!

Today I got a very strange look from my neighbour's kid. He spotted me through the window as I was preparing the primer, wearing the respirator. I hope I didn't scare him.

It is great to be able to paint on a rainy day with temperatures in the 40s (Fahrenheit). The paint booth works like a charm; the only missing bit is a stand for the paint gun. I have a hook on the wall, but that is too short. Should be easy to fix. Now if my spraying skills were on the same standard as the booth ...

I have primed the rudder skeleton and the elevator stiffeners. Maybe I can do the elevator skins tomorrow.

2011-02-26_01.jpg

Preparing rudder skeleton

Today I disassembled the rudder skeleton, deburred all the holes, and edge finished the R-405PD rudder horn. Then I mounted the E-614-020 counter weight to the R-703 rib by enlarging the mounting holes in the rib to #12, then dimpling them with the #10 screw dimpler and countersinking the lead:

2010-11-21_01.jpg

I won't mount the lead permanently until the rudder is riveted, so no nuts yet, and the lead is back on the shelf:

2010-11-21_02.jpg

Finally I dimpled the skeleton parts, so the skeleton is now ready for scuffing and priming. I couldn't reach the rear holes of the two ribs with the squeezer, so I used the die holder for the rivet gun that I bought from Cleaveland with a male die, and a piece of steel with a countersunk hole as female die. Worked like a charm. If you wonder, that die holder is not in Cleaveland's catalog. It is part of their "Avery C-Frame Retrofit Kit", but if you call them and explain what you need they sell you just the die holder for a third of the price of the retrofit kit.

2010-11-21_03.jpg

Still alive

The past few weeks were dominated by work, work, and ... work. I haven't been home a lot, and the little time I was here I spent either at the computer or sleeping. Okay, that's not entirely true. I did actually take a long weekend off beginning of October (wow, that's long ago) to go to Milfield with a small group of people from my glider club. The aim was to fly in the wave, and I did three times.

2010-11-14_03.jpg

2010-11-14_04.jpg

Some fun with a mini-cumulus -- does this count as self-portrait?

2010-11-14_05.jpg

Fast forward to today's afternoon. Work finally got a bit calmer (it will change again, but that's another story) and I took advantage of it and got into the workshop. Van's calendar on the wall still showed the September picture, so I flipped two pages and started to work.

I got the frame for my DRDT-2 welded, but they bolted the die holder on the wrong way. So I fixed that and adjusted everything. What a nice tool! I also got a backriveting plate, so I can now return Steve's tools.

2010-11-14_01.jpg

Then I match-drilled the R-716 rudder bottom attachment strips to the rudder, and drilled all the remaining holes to final size.

2010-11-14_02.jpg

Not a long session today, but it's good to be back on the project. The wings should arrive before Christmas; we hope to beat the VAT increase deadline. They are already in the container.

Bending the rudder

After a busy week I got back into the workshop today. Bought a couple of door hinges for 30 cent a piece, including the screws. Not too bad. I also found 1/8" dowels in a model shop. Equipped like this I built a bending brake from 2x4s which I still had at home, taped the dowels in the back of the rudder to prevent it from being crushed, and started bending.

2010-09-11_01.jpg

2010-09-11_02.jpg

The other builders are right. Boy, this takes quite some force! It didn't take long until I attached two large clamps to the brake:

2010-09-11_03.jpg

When I built the brake I had left a 1/8" gap between the lumber, but now I think that's too wide. It was hard to get the last bit bent, even though I took out the dowels. Nevertheless, in the end it worked out fine. Looks already like a rudder:

2010-09-11_04.jpg

Closeup of the trailing edge. Good enough for government work:

2010-09-11_05.jpg

More rivets

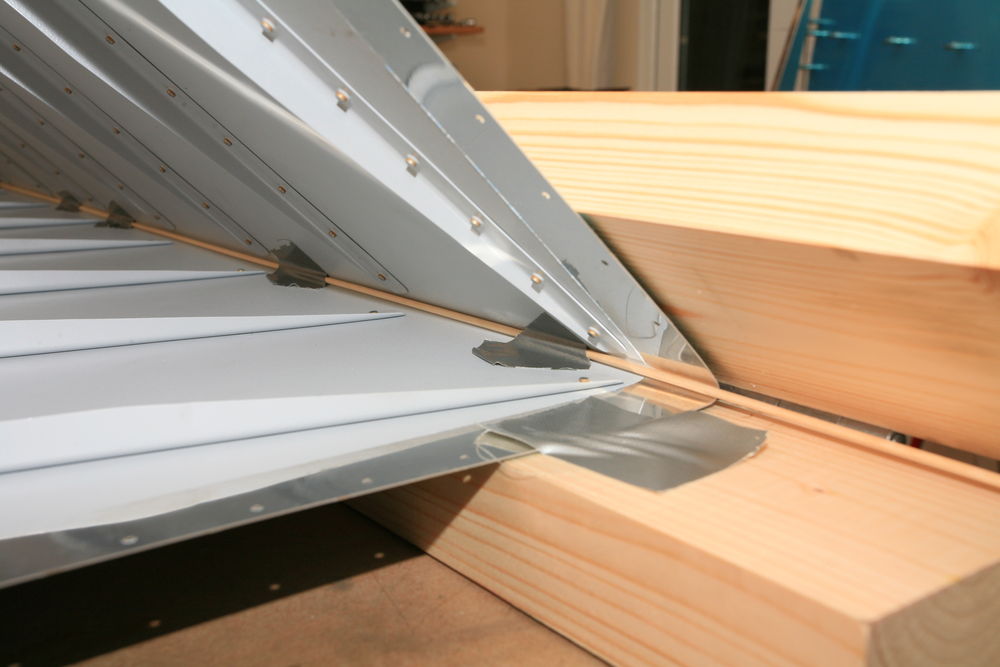
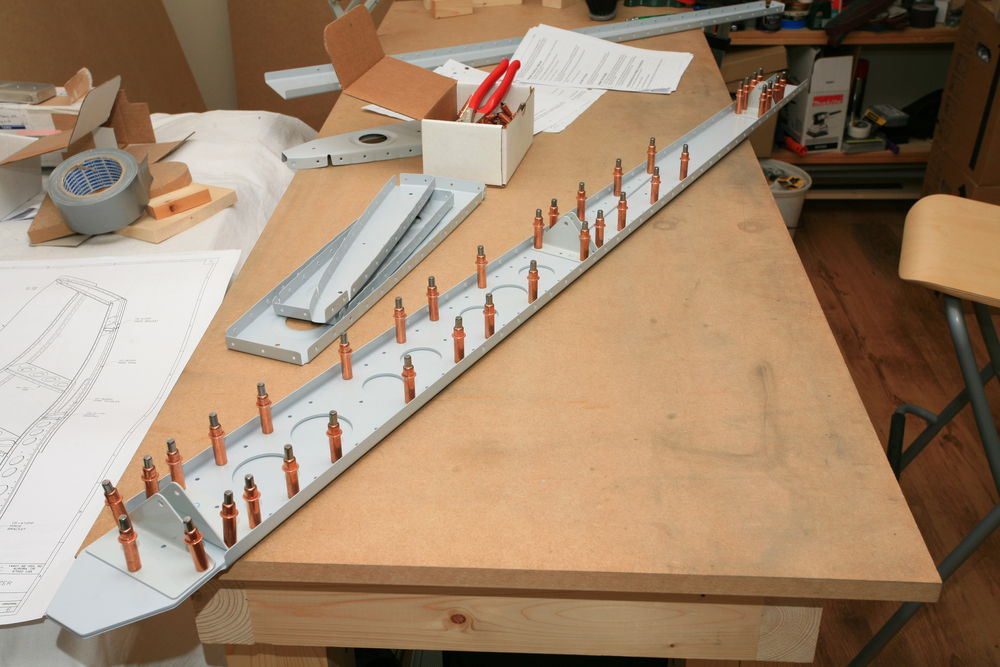
Two productive days! Yesterday I had my first large rivet session. I riveted the stiffeners to the rudder skin. Backriveting is the best option here, so the first step is to insert rivets in the holes and fix them with tape. I use Scotch Magic Tape -- much cheaper than rivet tape and works just as good.

2010-09-05_01.jpg

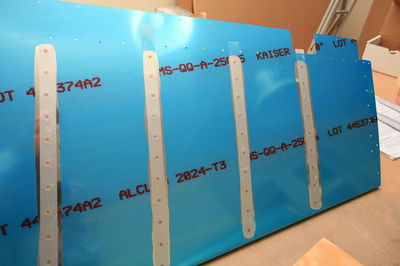
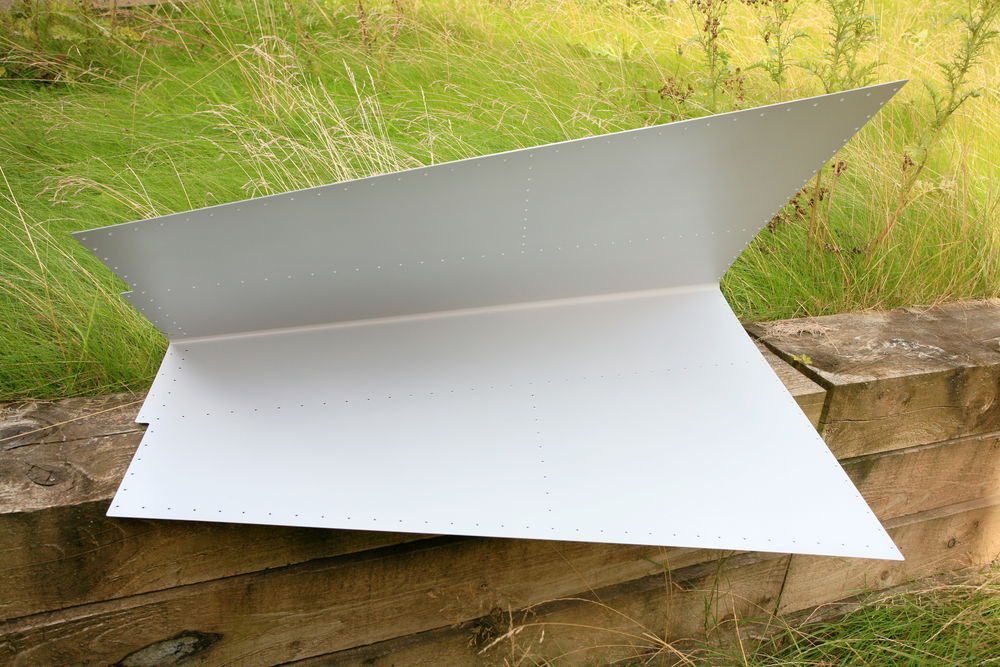
Then you place the skins with the manufactured rivet heads down on a heavy flat chunk of steel and form the shop heads with the rivet gun. This is how the skin looked afterwards; it really is a different beast now, gone is all the floppiness:

2010-09-05_02.jpg

2010-09-05_03.jpg

2010-09-05_04.jpg

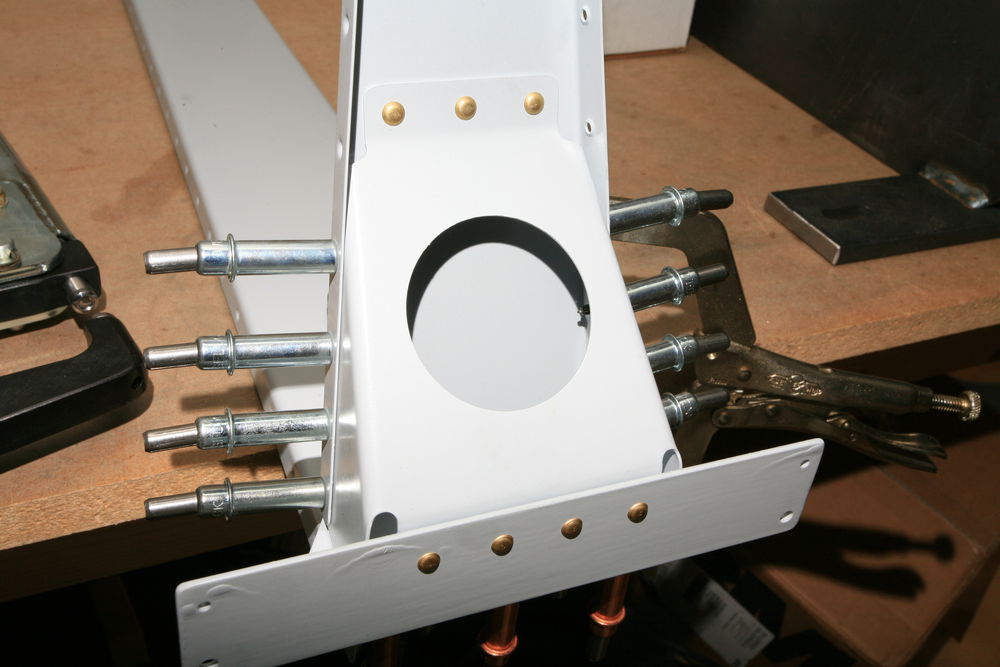
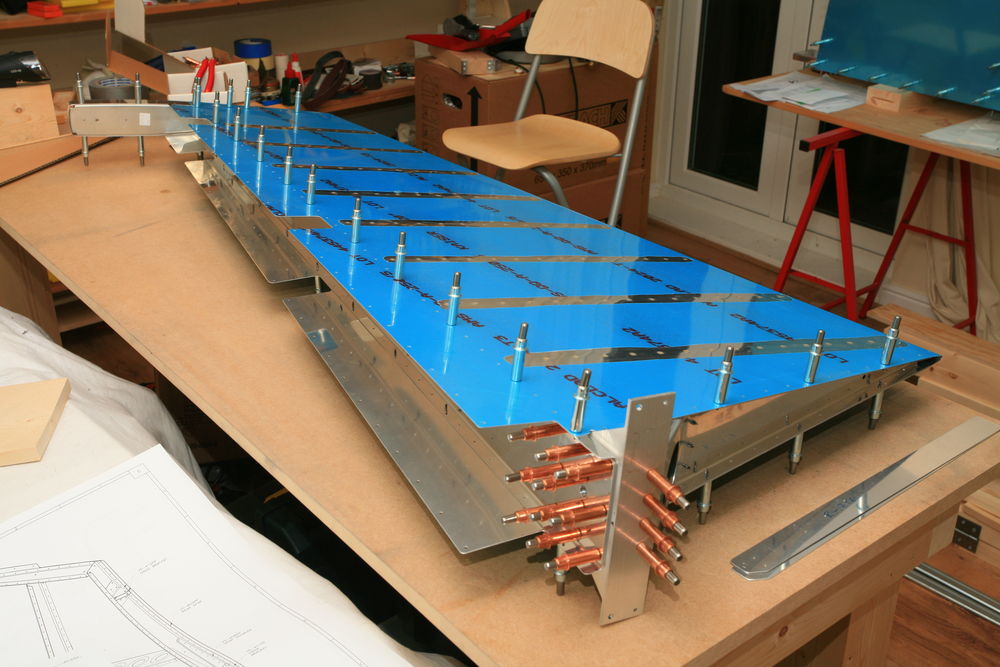
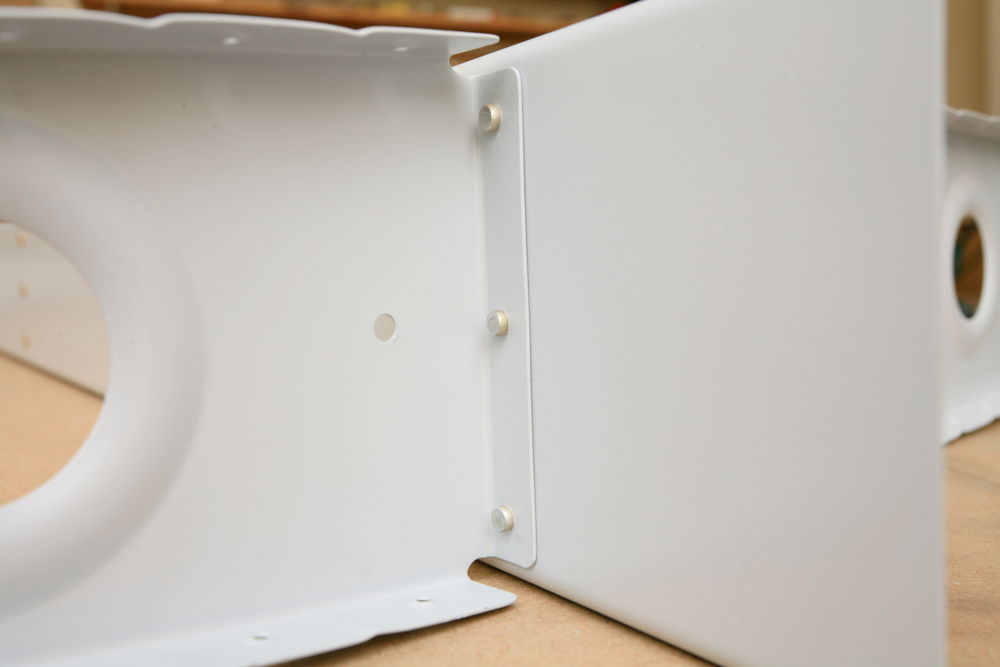
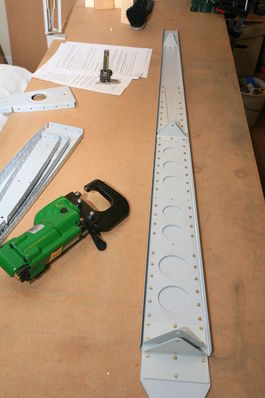
Then I assembled the VS rear spar. Ready for riveting:

2010-09-05_05.jpg

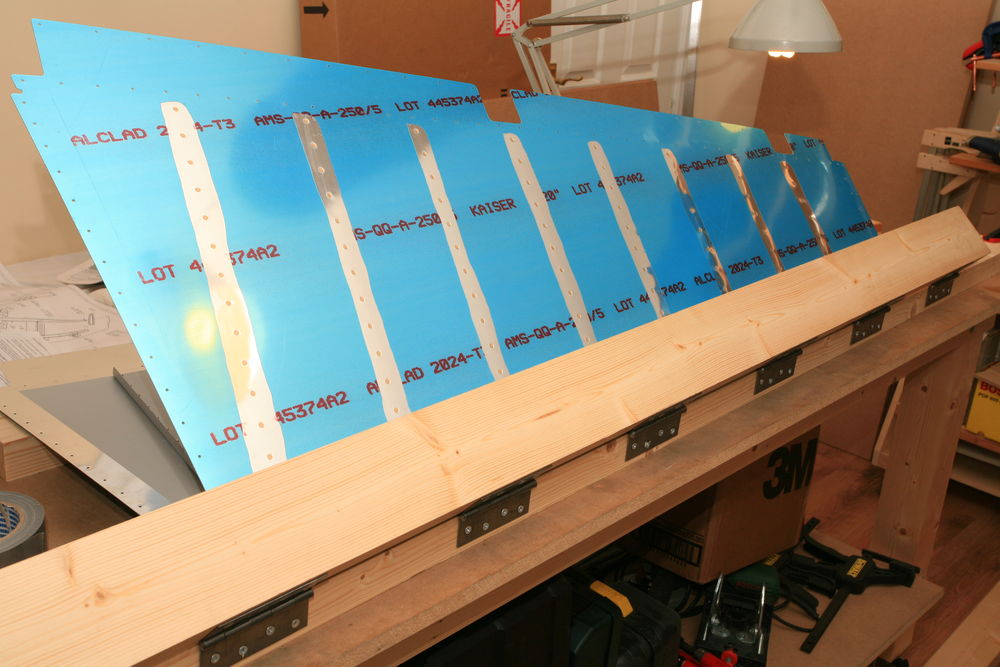
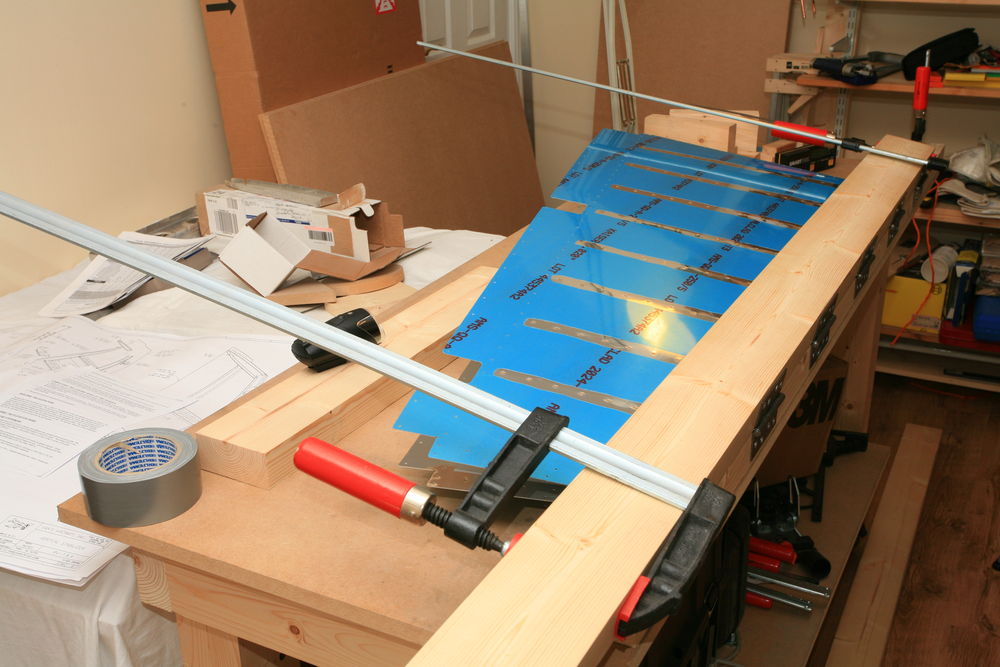
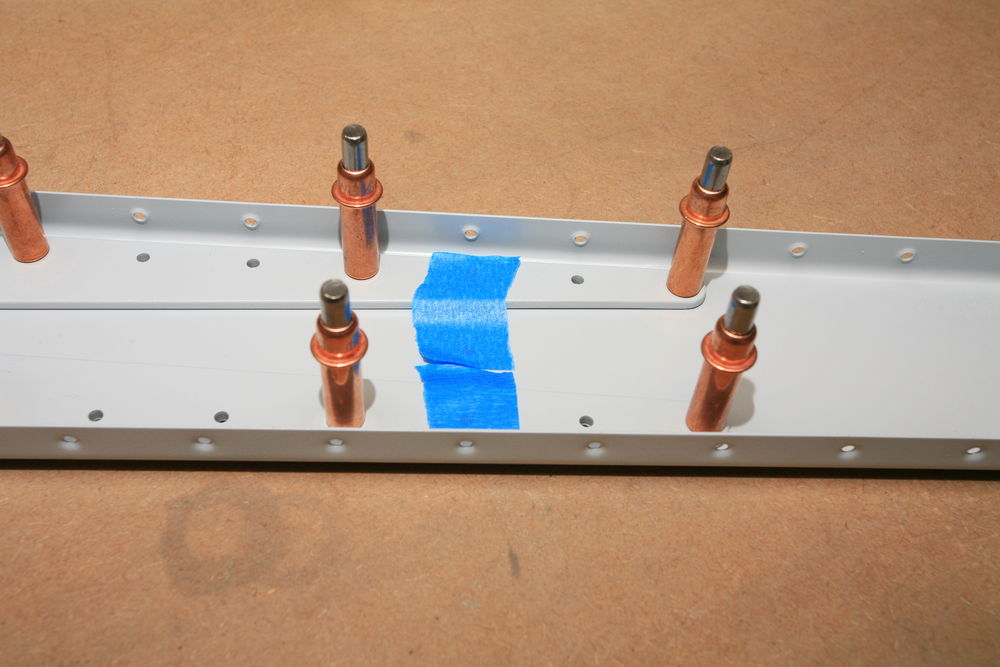
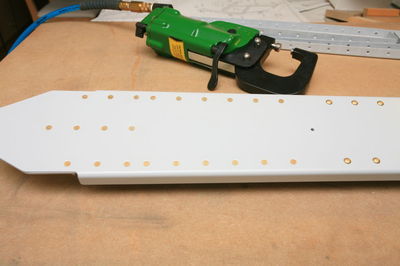
I taped over the holes where the ribs will be attached, so that I don't accidentally put rivets in:

2010-09-05_06.jpg

All done, gotta love that pneumatic squeezer!

2010-09-05_07.jpg

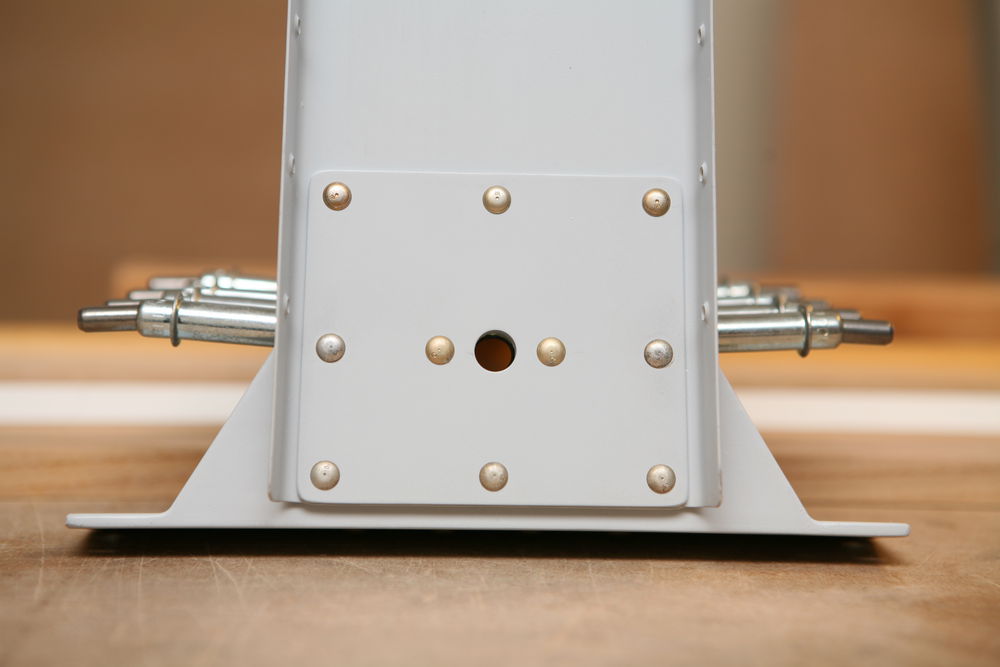
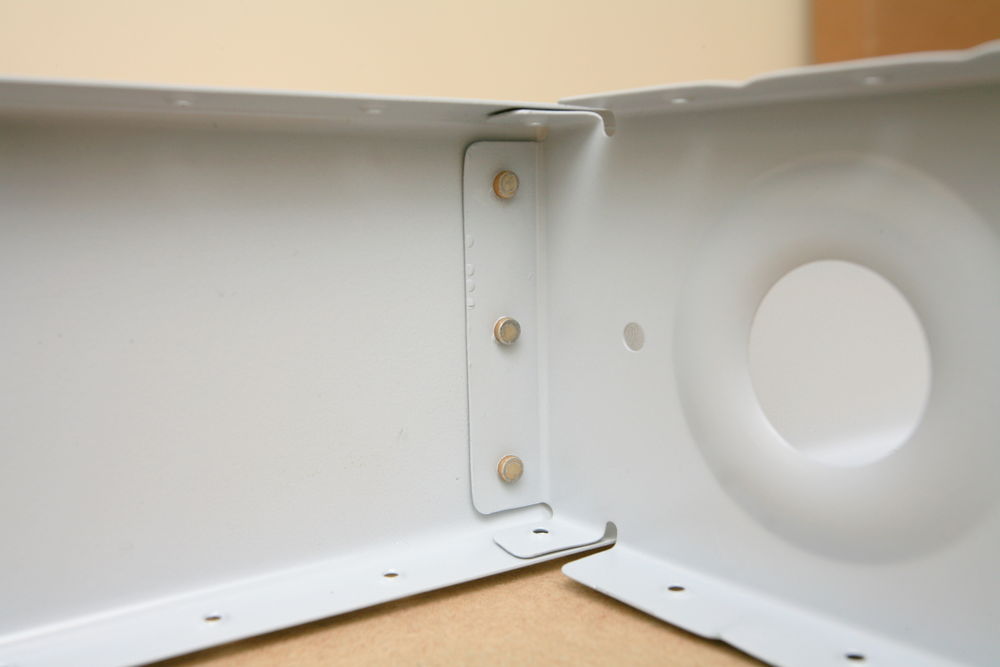
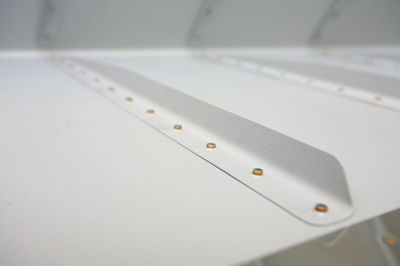
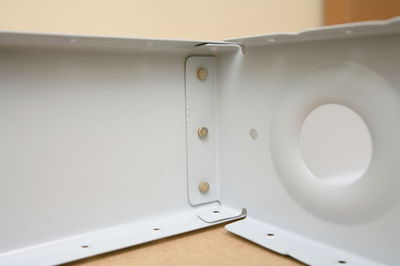
In the lower part of the spar flush rivets are used. That's where the VS will be attached to the fuselage, and universal rivet heads would interfere:

2010-09-05_08.jpg

This afternoon I first riveted the VS ribs to the front spar:

2010-09-05_09.jpg

2010-09-05_10.jpg

I told you that I got some runs on the first ribs I primes ...

2010-09-05_11.jpg

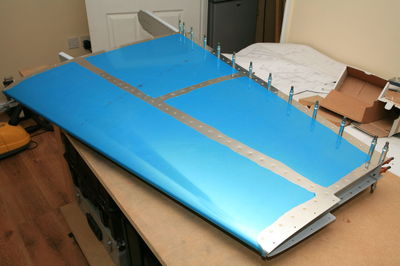
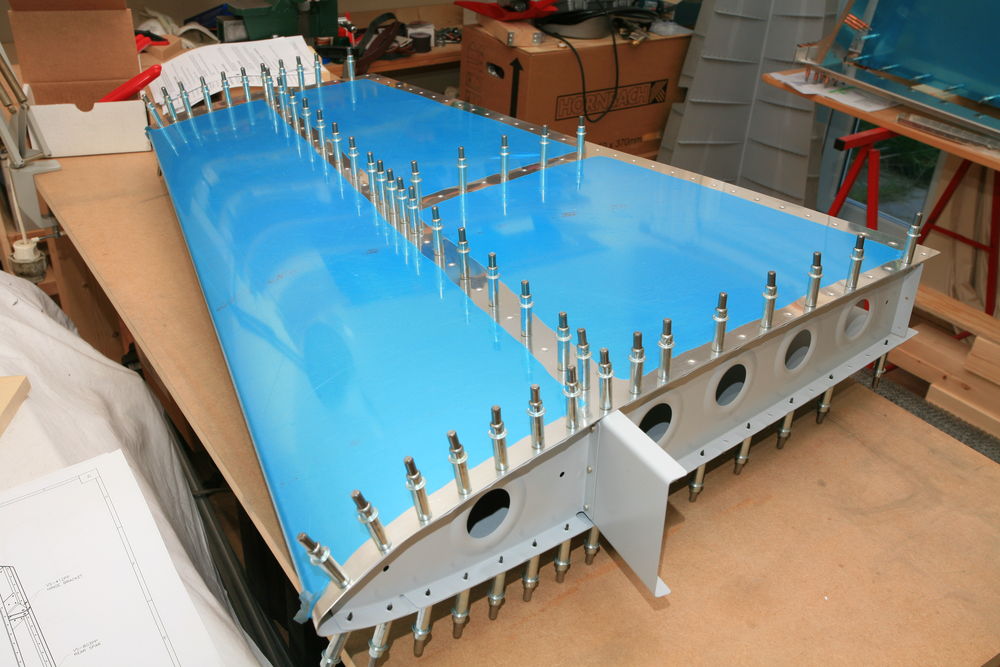
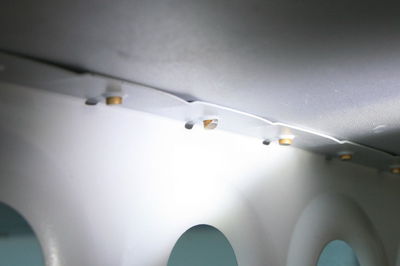
Now I could cleco and then rivet the VS skin to the front spar and the ribs. I love that tungsten bar!!!

2010-09-05_12.jpg

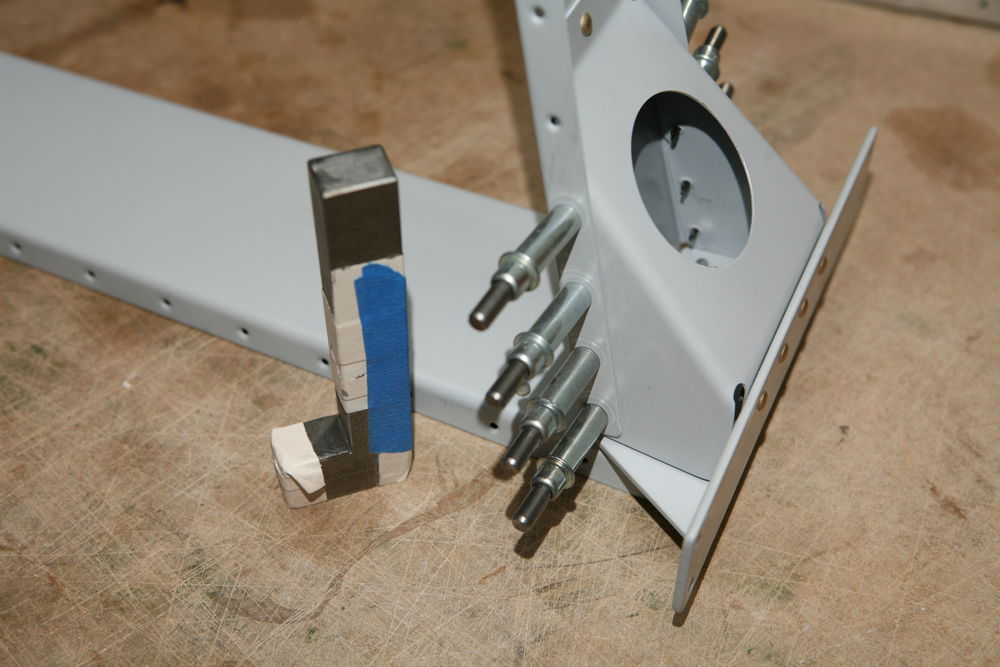
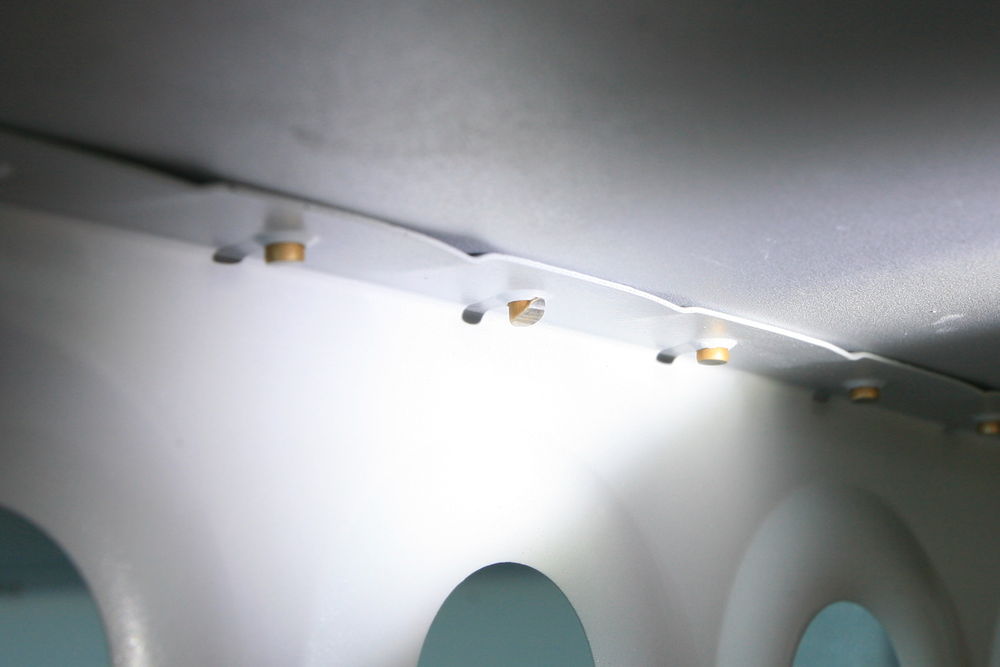
I drilled out four rivets on the VS. On two I slipped with the bucking bar (see the picture below) and two were simply too short. Van's calls for AN426AD3-4 rivets where the front spar and the main rib at the bottom meet, but there's no way to get a proper shop head with that. I ended up using -4.5 and that worked fine.

2010-09-05_13.jpg

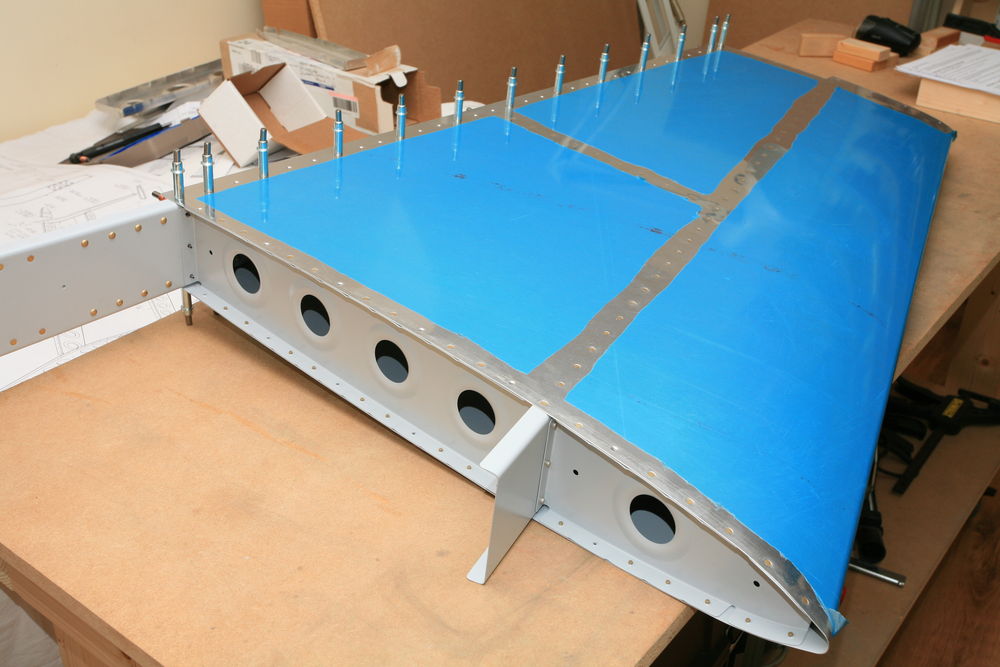
Look ma, no clecos! (Except on the rear spar, that is. I can't close any parts before someone official has looked at them.)

2010-09-05_14.jpg

2010-09-05_15.jpg

Prime time

This afternoon was prime time! Premiere with a spray gun for me, too. I had cleaned and etched all the VS skeleton parts and the rudder stiffeners yesterday, and the VS and rudder skins today. For the rudder I left the outer part of the skin unprimed, since it still needs to be drilled to the spar and dimpled. So I taped that area for scuffing, etching and priming. Impressive to see the difference between the bare alclad and the scuffed and etched surface:

2010-08-31_01.jpg

Shooting the primer is really a learning experience. I got some runs on the flanges of the first ribs I primed, but the later parts went much better. I also grossly underestimated the amount of primer I need, so I ran out of primer three times. Later I searched the VAF archives and found that the amount I used isn't uncommon at all, and measuring the thickness in a couple of locations shows that I have about .0015 inch of primer on the parts (well, except for those first ribs ...).

BTW, I'm using Stewart's EkoPoxy, smoke gray. This is a water borne epoxy primer that forms a sealed surface. It is supposed to be fairly tough and the best part is: it's considered non-hazardous and doesn't contain chromates or lead. I still wear a respirator, but I'm not as concerned about my health as I would be with the classic zinc chromate stuff. Since it's water borne, cleanup is easy, too -- just rinse with water.

The VS skeleton:

2010-08-31_02.jpg

Rudder skin:

2010-08-31_03.jpg

VS skin (no, I didn't shoot it in the grass):

2010-08-31_04.jpg

About this Archive

This page is an archive of recent entries in the Rudder category.

Horizontal Stabilizer is the previous category.

Vertical Stabilizer is the next category.

Find recent content on the main index or look in the archives to find all content.