Recently in Shop Category

Flange straightener

In this VAF thread and in the "27 Years of the RVator" I found an ingenious little tool for straightening rib flanges. The anvil is undercut by 11 degrees, so that when the aluminum springs back it's at a perfect 90 degree angle. I made both the anvil and the handle from some ash I had lying around from a 4x5 view camera I built several years ago.

2012-12-19_01.jpg

Building this tool took me less time than I spent straightening the flanges in the empennage, and it makes the straightening job a breeze. Much more accurate, too.

2012-12-19_02.jpg

Shop vac cyclone separator

Who hasn't been annoyed by the fact that the shop vac is always full? Buying dust bags doesn't come cheap, either. I remembered having seen a homebuilt cyclone separator, so I searched the web and came up with this one: The Thien Cyclone Separator Lid. Looked great, and I decided to build my own.

My version is based on a galvanized IKEA planter, some threaded rod, PVC piping and plywood of the crate my lathe came in. Here is the baffle fitted in the planter:

2012-12-18_06.jpg

The completed lid. The fittings are glued in using hot glue:

2012-12-18_07.jpg

One would think that waste water tubing is standardized. Nope. Isn't. I had to turn one of the pieces down on the lathe to make it fit:

2012-12-18_08.jpg

The completed separator, mounted together with my vacuum cleaner on a little plywood trolley built from the lathe crate. This thing is awesome!

2012-12-18_09.jpg

Pan Am angle drills

Today I received my new Pan American angle drills from Avery. I had bought the Taylor angle drills before, but wasn't happy with their trigger action. Since I already have a regular Pan Am air drill (smooth as silk!), I phoned Bob and asked if I could send the Taylors back and exchange them for Pan Am drills. That was no problem at all (Avery's customer service is great) and I'm very happy I did that. The Pan Am drills are so much nicer. Smooth trigger action, no kick back when they start (unlike Taylor), nice variable speed, and I believe they are a bit quieter.

Here they are, equipped with Avery's air line swivel:

2011-05-14_01.jpg

Paint booth, the Grand Finale

The paint booth is done! I installed the missing wall yesterday and finished the last bits today.

2011-02-25_01.jpg

You can see that I filter the air before blowing it out, to get rid of the overspray. The filter material again is vacuum cleaner bags.

I have a window above the spray table so that I can open the outside window for the exhaust funnel. To be able to reach that far I need to fold the spray table away. Here is my hi-tech solution for holding it in place:

2011-02-25_02.jpg

Now back to aluminum. Woohoooo!

Paint booth, part 3

There was some progress during the past three weeks, even though I didn't write anything here. A few evenings of 3D puzzle shuffling, aka "how do I build four walls and a ceiling in a room such that I make use of the full size of the room and still can staple plastic foil to the outside of the booth". If you have space to build the wooden frames it's trivial to set up a booth like this. If your work space is confined to the final size of the booth, because otherwise you can't get the parts through the door, things start to get interesting. But I'm almost there, only the wall with the exhaust is missing, and of course the spray table (for which I will reuse the chicken wire frame I already have).

Here is the exhaust fan before closing the lower part of the side you are looking at. The fumes will leave the casing at the top, blowing them out of the window.

2011-02-23_01.jpg

And this is the current status of the booth. 8x36W fluorescent tubes for 35 square feet is lots of light! Note that I can mount the lights inside the booth since I only use waterborne paint, nothing explosive. On the right you see the open door with the filter for the incoming air -- I simply use the largest vacuum cleaner bag I could find. One of these bags covers half the door. You can also see the exhaust fan facing the window.

2011-02-23_02.jpg

Paint booth, part 2

Some more wood work today, and I have to say I like aluminum better. Here's the structure for the fume extractor. I need this funny shape to get around the spray table and to the window.

2011-01-30_01.jpg

Before you ask: Yes, that's the Nov. 2010 calendar picture on the wall. I haven't received the 2011 calendar yet, so I keep the nice 2010 pictures around until it arrives.

Paint booth, part 1

Building in the living room has advantages, but also drawbacks. One major drawback is that I can't prime inside the house, and now in winter I also can't prime outside. So I have decided to build a paint booth. I have a small room that qualifies as "bedroom" in this country, even though there is no way to fit a standard sized bed into it. So far I had used it for storage. Now it will become my top-of-the-art paint booth:

2011-01-23_01.jpg

The plan is to use battens and thick plastic foil to construct a booth, and to install a fan that blows the fumes out of the window. I only use waterborne paint, nothing flamable, so the fan doesn't have to be explosion proof. Here is the fan (yes, I'm using safety wire to hold it in place):

2011-01-23_02.jpg

To give you an idea where the fan will be located:

2011-01-23_03.jpg

You can see that I have covered the floor with fiber board to protect the carpet. The boxes on both sides of the fan are closed with fiber board on the back and on the outer sides. The top and front will be covered with a filter to keep the overspray away from the fan; same for the front face of the fan. The downstream side of the fan (pointing upwards) will get a fiber board channel to the window.

DRDT-2 table

Today was woodworking time. I built tables to raise the skins to the level of the DRDT-2 when it's sitting on the workbench. Instead of building one large table I built two smaller ones -- one for each side of the dimpler. Like this I can move them flexibly and they are easier to store away. I also built a narrow third table so that I can extend the workspace once I have to deal with the large wing skins.

I kept everything quite simple:

2010-11-20_02.jpg

Tables in action:

2010-11-20_01.jpg

Still alive

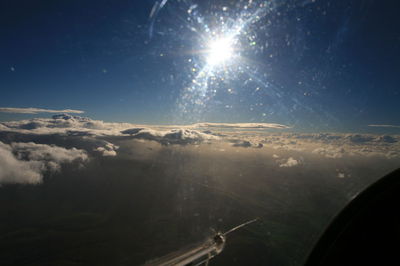
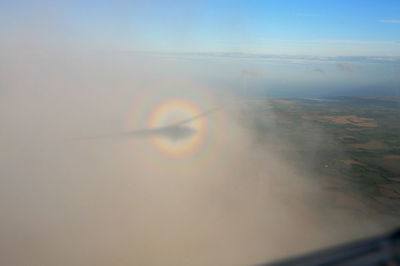
The past few weeks were dominated by work, work, and ... work. I haven't been home a lot, and the little time I was here I spent either at the computer or sleeping. Okay, that's not entirely true. I did actually take a long weekend off beginning of October (wow, that's long ago) to go to Milfield with a small group of people from my glider club. The aim was to fly in the wave, and I did three times.

2010-11-14_03.jpg

2010-11-14_04.jpg

Some fun with a mini-cumulus -- does this count as self-portrait?

2010-11-14_05.jpg

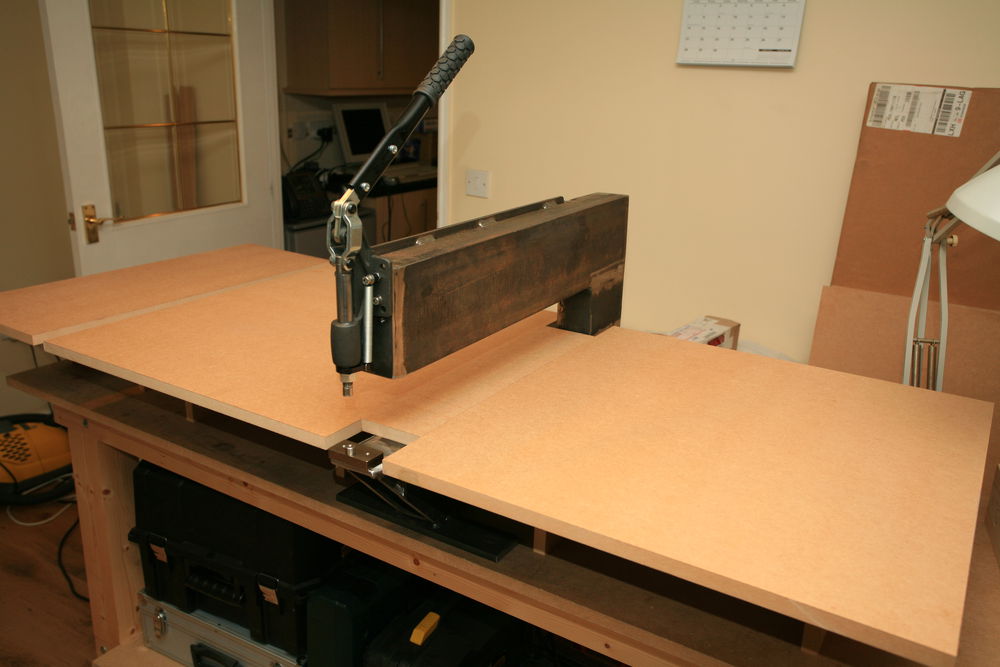
Fast forward to today's afternoon. Work finally got a bit calmer (it will change again, but that's another story) and I took advantage of it and got into the workshop. Van's calendar on the wall still showed the September picture, so I flipped two pages and started to work.

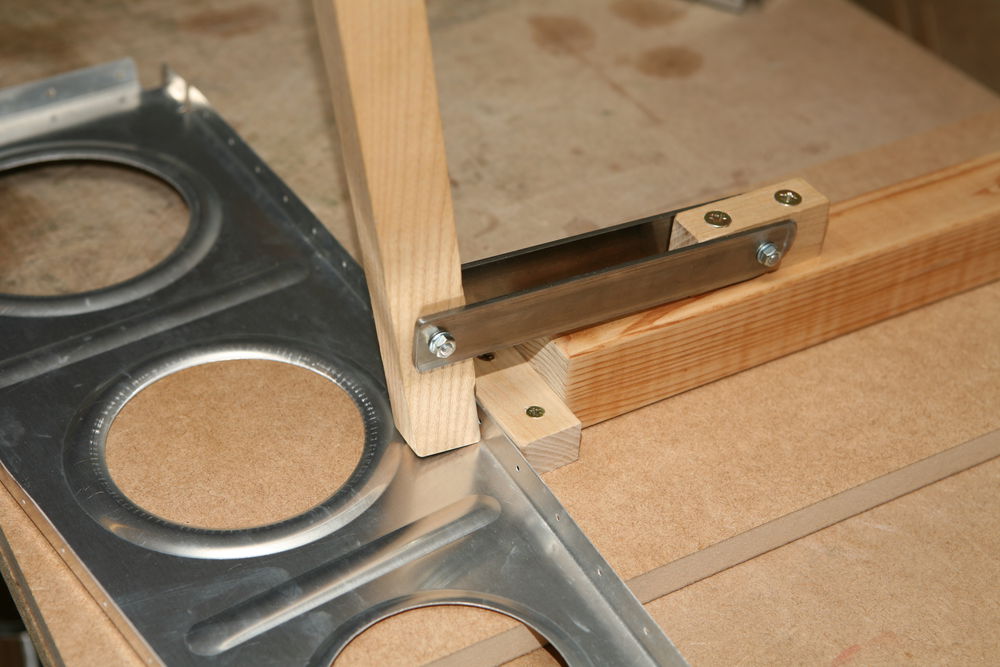
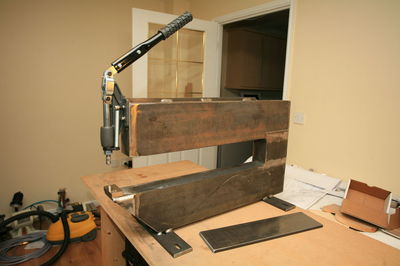
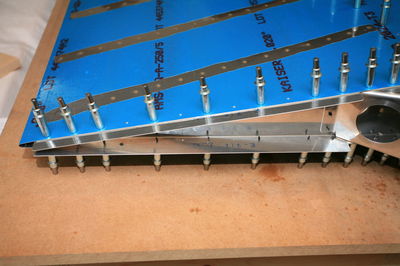
I got the frame for my DRDT-2 welded, but they bolted the die holder on the wrong way. So I fixed that and adjusted everything. What a nice tool! I also got a backriveting plate, so I can now return Steve's tools.

2010-11-14_01.jpg

Then I match-drilled the R-716 rudder bottom attachment strips to the rudder, and drilled all the remaining holes to final size.

2010-11-14_02.jpg

Not a long session today, but it's good to be back on the project. The wings should arrive before Christmas; we hope to beat the VAT increase deadline. They are already in the container.

Spray table

Yesterday I wanted to do something quick; a frame with chicken wire as spray table. No problem with the frame, but ... Let me tell you that I'm usually not cheap when it comes to buying tools. I prefer good quality even if that means that I have to spend some money. Five months ago was an exception. I needed a stapler to put the blankets in my compressor enclosure and thought that I don't need it often enough to invest money. Besides that, what could possibly go wrong with a stapler?

I can tell you now: First it was not strong enough to get the tiny 2/8" staples all the way into the pine, and after five or six staples it died altogether. It really only lived long enough for the compressor blankets, yesterday it found its final peace in my trash bin.

Fast forward one day. After work I stopped by at a tool store and got a new stapler, about five times more expensive than the old one, but at least it's not made of plastic. I also got four new trestles (learned that word today -- don't we build for education and recreation? I guess this qualifies as "education"), since all my saw horses are already in use. With the new stapler finishing that spray table was a breeze:

2010-08-25_01.jpg

About this Archive

This page is an archive of recent entries in the Shop category.

Preparation is the previous category.

Wings is the next category.

Find recent content on the main index or look in the archives to find all content.